Automatic Godot game export and upload to Steam and Itch
- 10 minsAs I was procrastinating on my game Colorspace, I finally decided to take the time to automate the build and upload for my Godot games. Now that I’ve done it, I don’t understand why I didn’t do it earlier. That’s why I want to share how I did it and hopefully show you it’s relatively easy.
If you don’t want to read, checkout the GitHub repo here.
What I want
Before diving into the explanations, let me tell you what I wanted to achieve and what I decided to use for that. The goal was to export a build for each template I have (windows & linux, steam and itch) with an automatic build number, folder and archive creation. I also wanted to have it upload automatically to the two platforms I use, Steam & Itch.
For that, I decided to go with python, as it’s pretty easy to program with and it runs everywhere. Python is very similar to GDScript (or the opposite? 😏) so I knew it would be easy. You can easily call whatever program you need or execute command and it seems much easier to deal with than batch. I find Python to be much easier to work with, especially when you have to deal with path, folder creation, extracting strings from files and archive creation.
To upload to Steam, I used steamcmd, their command line tool used to do a bunch of things. You should already have it as it comes with the steamworks sdk.
For itch, I used Butler, their command line tool for uploading. It’s super easy to work with!
Export
Exporting with Godot
Godot 3
With Godot 3.5, if you have Godot in path, exporting a template called “Windows ITCH” looks like this 👇
godot --export "Windows ITCH" build/test/game_name.exe
Pretty simple, right? This will open up Godot, and start the export in release mode. “Windows ITCH” is the template I want to use, and finally “build/test/game_name.exe” is the path of the executable I want to create.
You can read about exporting more in details on the documentation.
Godot 4
The command is slightly different for Godot 4 👇
godot --export-release "Windows ITCH" build/test/game_name.exe
--export is now --export-release and most importantly allows using --headless to run the export without launching the Godot editor which should be a bit faster and allows exporting on platforms that don’t have graphics card. Read more on the documentation page.
⚠ Be careful there’s a bug at the time of writing that stripes ShaderMaterial when ussing –headless. See the issue on GitHub.
Getting the build number
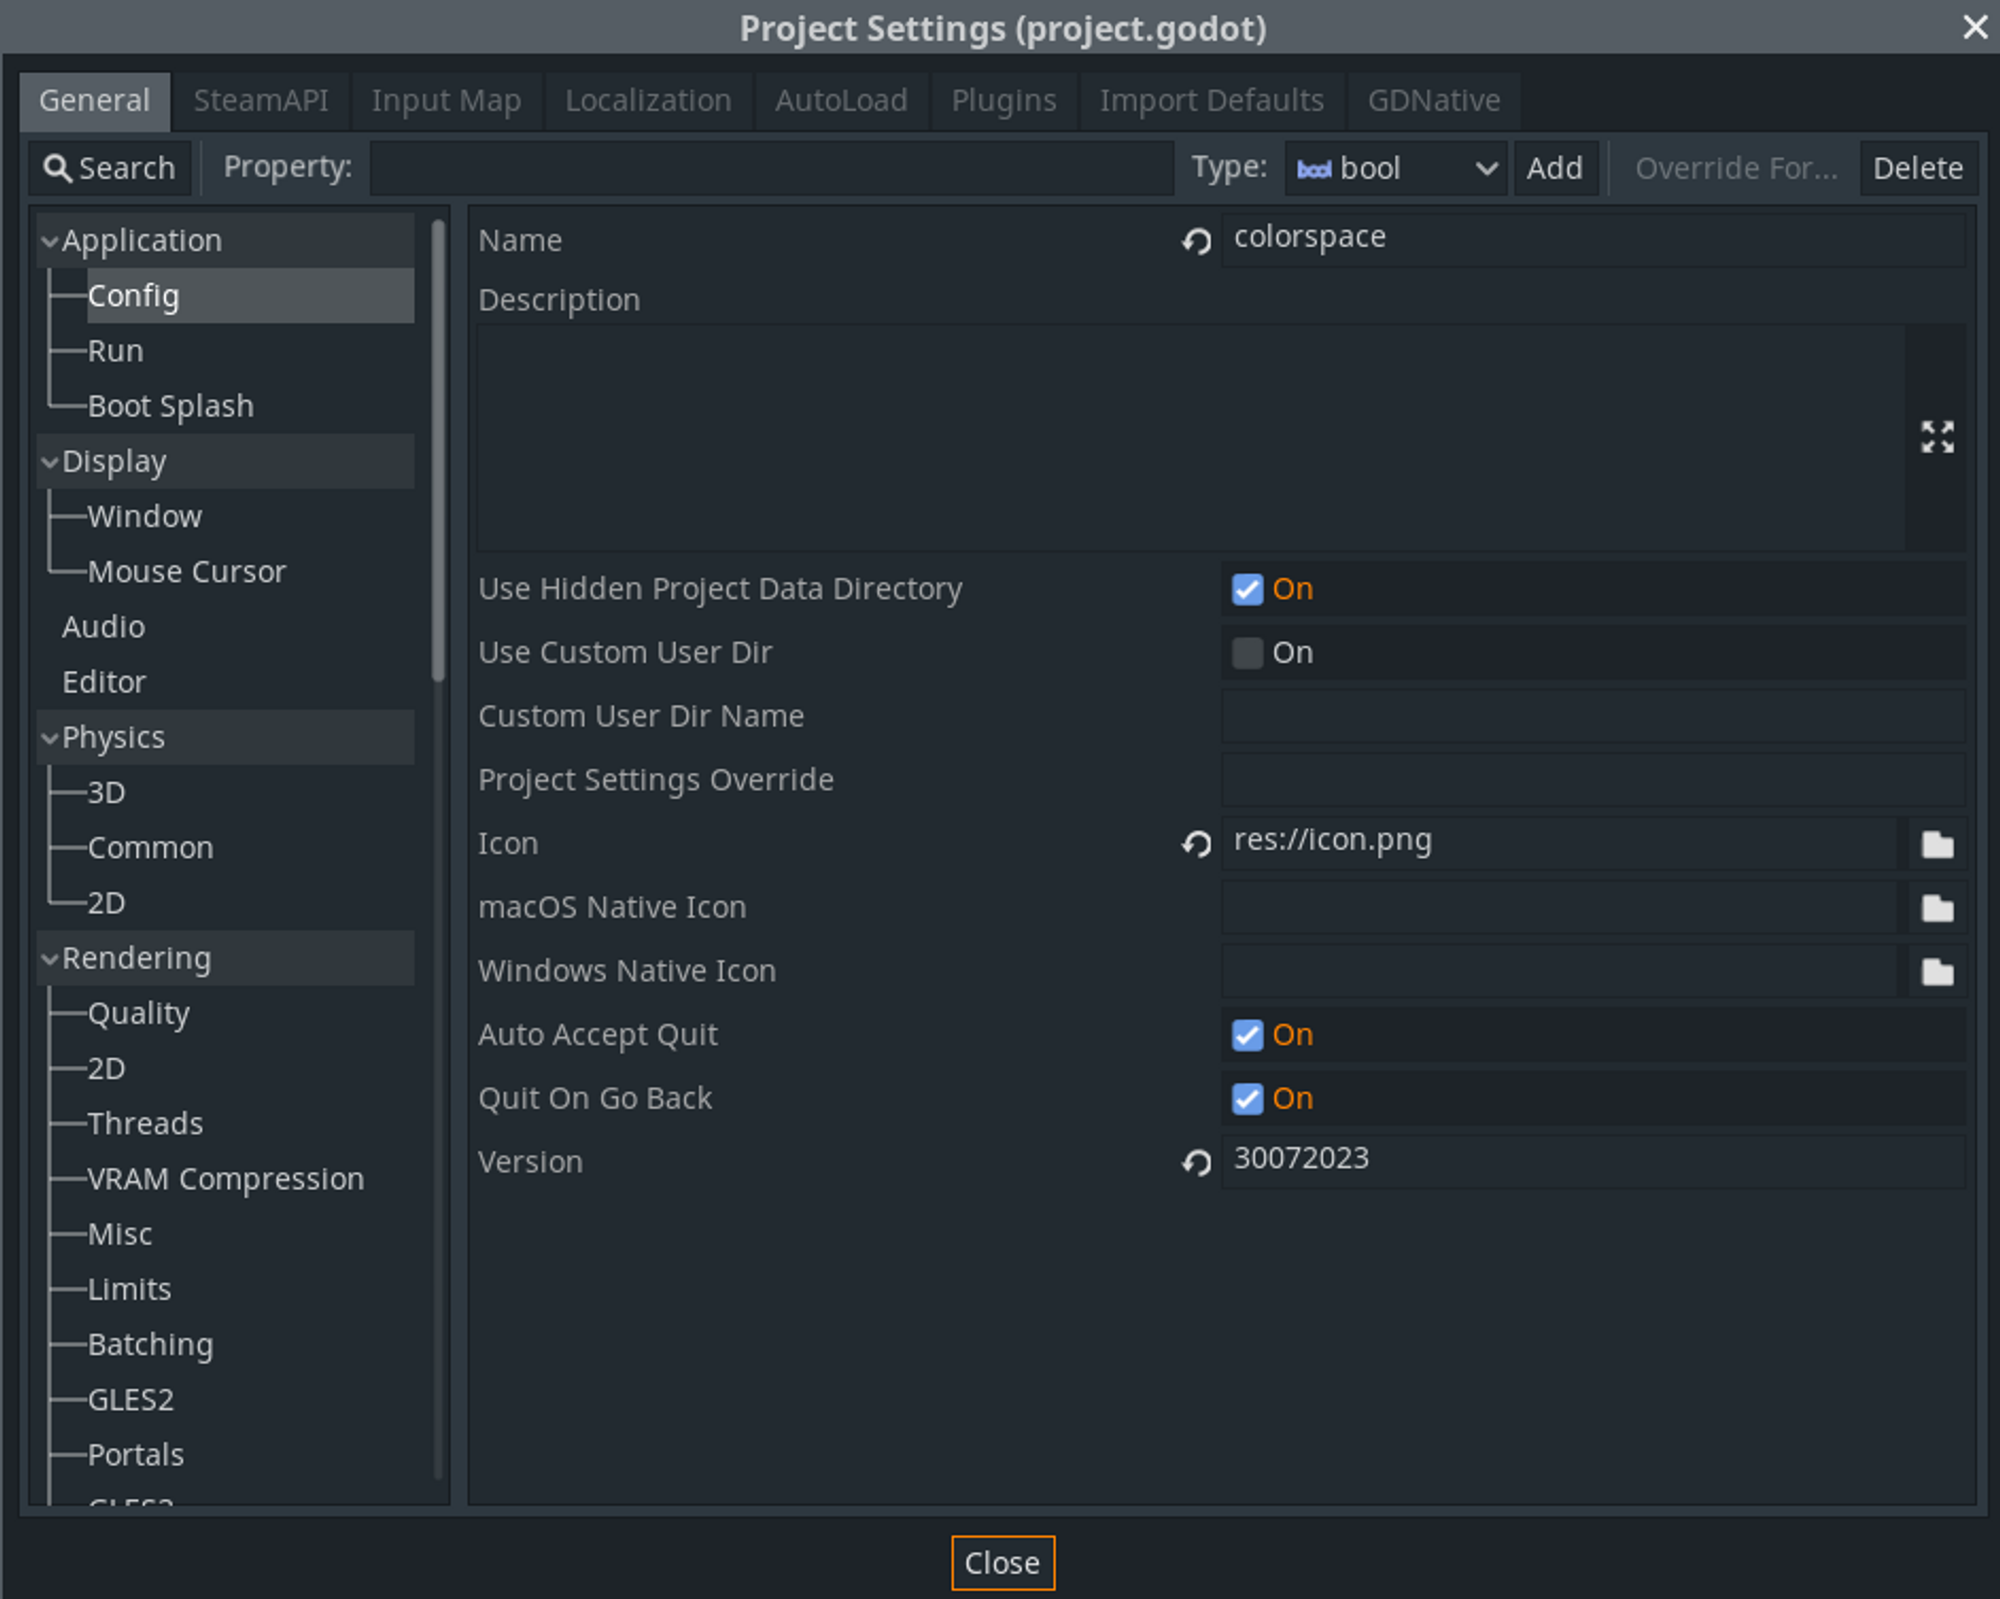
The other thing I wanted was to have the build number grabbed automatically. There are multiple ways of doing it, but what I did was create my own entry in the project settings (checkout the docs on how to do it) so I can use it in the game by using ProjectSettings.get_setting("application/config/build_number").
To do the same thing in Python, I go through every line of the file and check if I find ‘config/version’ in it, and get the value.
# If you have a better way of parsing the file, tell me!
with open(file, 'r', encoding='UTF-8') as f:
    for line in f:
        if 'config/version' in line:
            number = line.strip().split("config/version=", 1)[1]
            number = number.replace('"', '')
            return number
Checkout the python script for more details.
Upload
The next step is uploading to Itch & Steam.
Itch
I started with Itch as it seemed to be the easiest. To upload there, you need to first download Butler. Once installed, you login using butler login and you’re good to go!
The upload command is super simple butler push directory user/game:channel --userversion x.x.0 which for me looked like butler push build/colorspace_buildnumber_itch.zip mreliptik/colorspace:windows --userversion buildnumber
with channel being windows or linux in my case. You can read more about it on the official doc.
And that’s basically it! It’s super simple and because it requires very minimal setup, you can use that all the time, even for game jams.
Steam
Ahhhh Steam, why do you always have to be so complicated? We like you but you already take 30% off everything we make and you also want our time? You little bastard!
To be honest, once you understand how it works, it’s not that complicated. It’s just a bit more complicated than itch.
You’ll need steam_cmd which is located inside the steamworks sdk > tools > ContentBuilder.
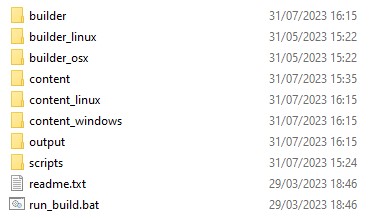
Once you’ve located this folder, you’ll see:
- three builder folder which corresponds to the build executable for windows, mac and linux.
- Content, which corresponds to the content that will be built.
- Output, which is the result of the build if applicable.
- scripts is where you put the different scripts that define how the build should run.
You can put the builder path into your environment variable if you want, or use the full path to the executable.
I’m creating two folder ContentWindows and ContentLinux next the Content, and I’ll use them to separate the content when building. This is to simplify the scripts later on. I know I’ll be able to build all the fils in that specific content folder and I don’t have to filter files for different depot.
Scripts
We need to setup the scripts, thankfully, Valve provides default scripts as examples. You’ll find them under the scripts folder or mine on my examples folder on GitHub.
You have one script for your app, which tells steam what depot you want to build for and one script per depot. In my examples, you can see I have two depot scripts because I have two depots to build: linux and windows.
In the app script, you just need to fill in your app ID, the description if you want and under depot add one line per depot, with your depot number and the associated depot script.
"AppBuild"
{
	"AppID" "APP_ID" // Your AppID
	"Desc" "Automatic build" // internal description for this build
	"Preview" "0"
	"ContentRoot" "" // content root folder relative to this script file
	"BuildOutput" "..\output" // output folder relative to this script file
	"Depots"
	{
		// file mapping instructions for each depot are in separate script files
		"DEPOT_NUMBER_1" "depot_build_DEPOT_NUMBER_1.vdf"
		"DEPOT_NUMBER_1" "depot_build_DEPOT_NUMBER_2.vdf"
	}
}
Read more in the docs here.
You then create one script per depot. You add your depot ID and the content folder you created. The path is relative to the script. Under FileMapping, I don’t do anything special because I want to upload all files that are in the folder. Here’s an example below 👇
"DepotBuild"
{
	// Set your assigned depot ID here
	"DepotID" "DEPOT_NUMBER_1"

	// Setup specific content folder for depot
    // I have one content folder per depot number, one for linux, one for windows
	"ContentRoot" "..\YOUR_CONTENT_FOLDER"

	// include all files recursively
	"FileMapping"
	{
		// This can be a full path, or a path relative to ContentRoot
		"LocalPath" "*"

		// This is a path relative to the install folder of your game
		"DepotPath" "."

		// If LocalPath contains wildcards, setting this means that all
		// matching files within subdirectories of LocalPath will also
		// be included.
		"Recursive" "1"
  }
}
Command
Once you have the scripts, you can finally call steam_cmd to upload your content. But first, you should run the command by hand as Steam will ask you for a steamguard code.
steamcmd +login STEAM_USERNAME STEAM_PASSWORD, +run_app_build_http APP_SCRIPT_PATH +quit
My python script simply copy the files to both content folder (linux and windows), upload to steam and then delete the files.
⚠ Don’t put a zip in the content folder for upload as Steam will not dezip it when installing on the client computer! You can manually upload zips through the Steamworks website but not when using SteamCMD.
Note this will NOT push the change to public unfortunately. Steam doesn’t allow automatic publishing on the default branch.. You still have to go to Steamworks and publish manually. It works for other branches though.
Final words
I hope this showed you that building and uploading to itch and steam is quite easy. Of course, the script I wrote is suited for what I need so you’ll have to adapt it to your liking. Using python makes it quite easy I believe as it’s pretty close to GDScript. You can also extend the functionalities to support other stores or even use github action to build the game for you. For a client project, I setup automatic upload and release creation on GitHub, which was easy to do using their command line program.
Exporting and uploading multiple games on multiple platforms can be super tedious, and I honestly regret waiting so long to put this script in place. I’ve been using it for a few weeks and it’s been amazing. I highly recommend taking the time to do it. It will make your release process much easier but also with less errors!
If you have any suggestion or corrections, please let me know in the comments 👇
Don’t forget to checkout the GitHub repo.
If you want to support my work, you can join my Patreon for lots of cool things, early access, source code and more!

Byyye👋

MrEliptik
Full-time indie game developer using Godot!